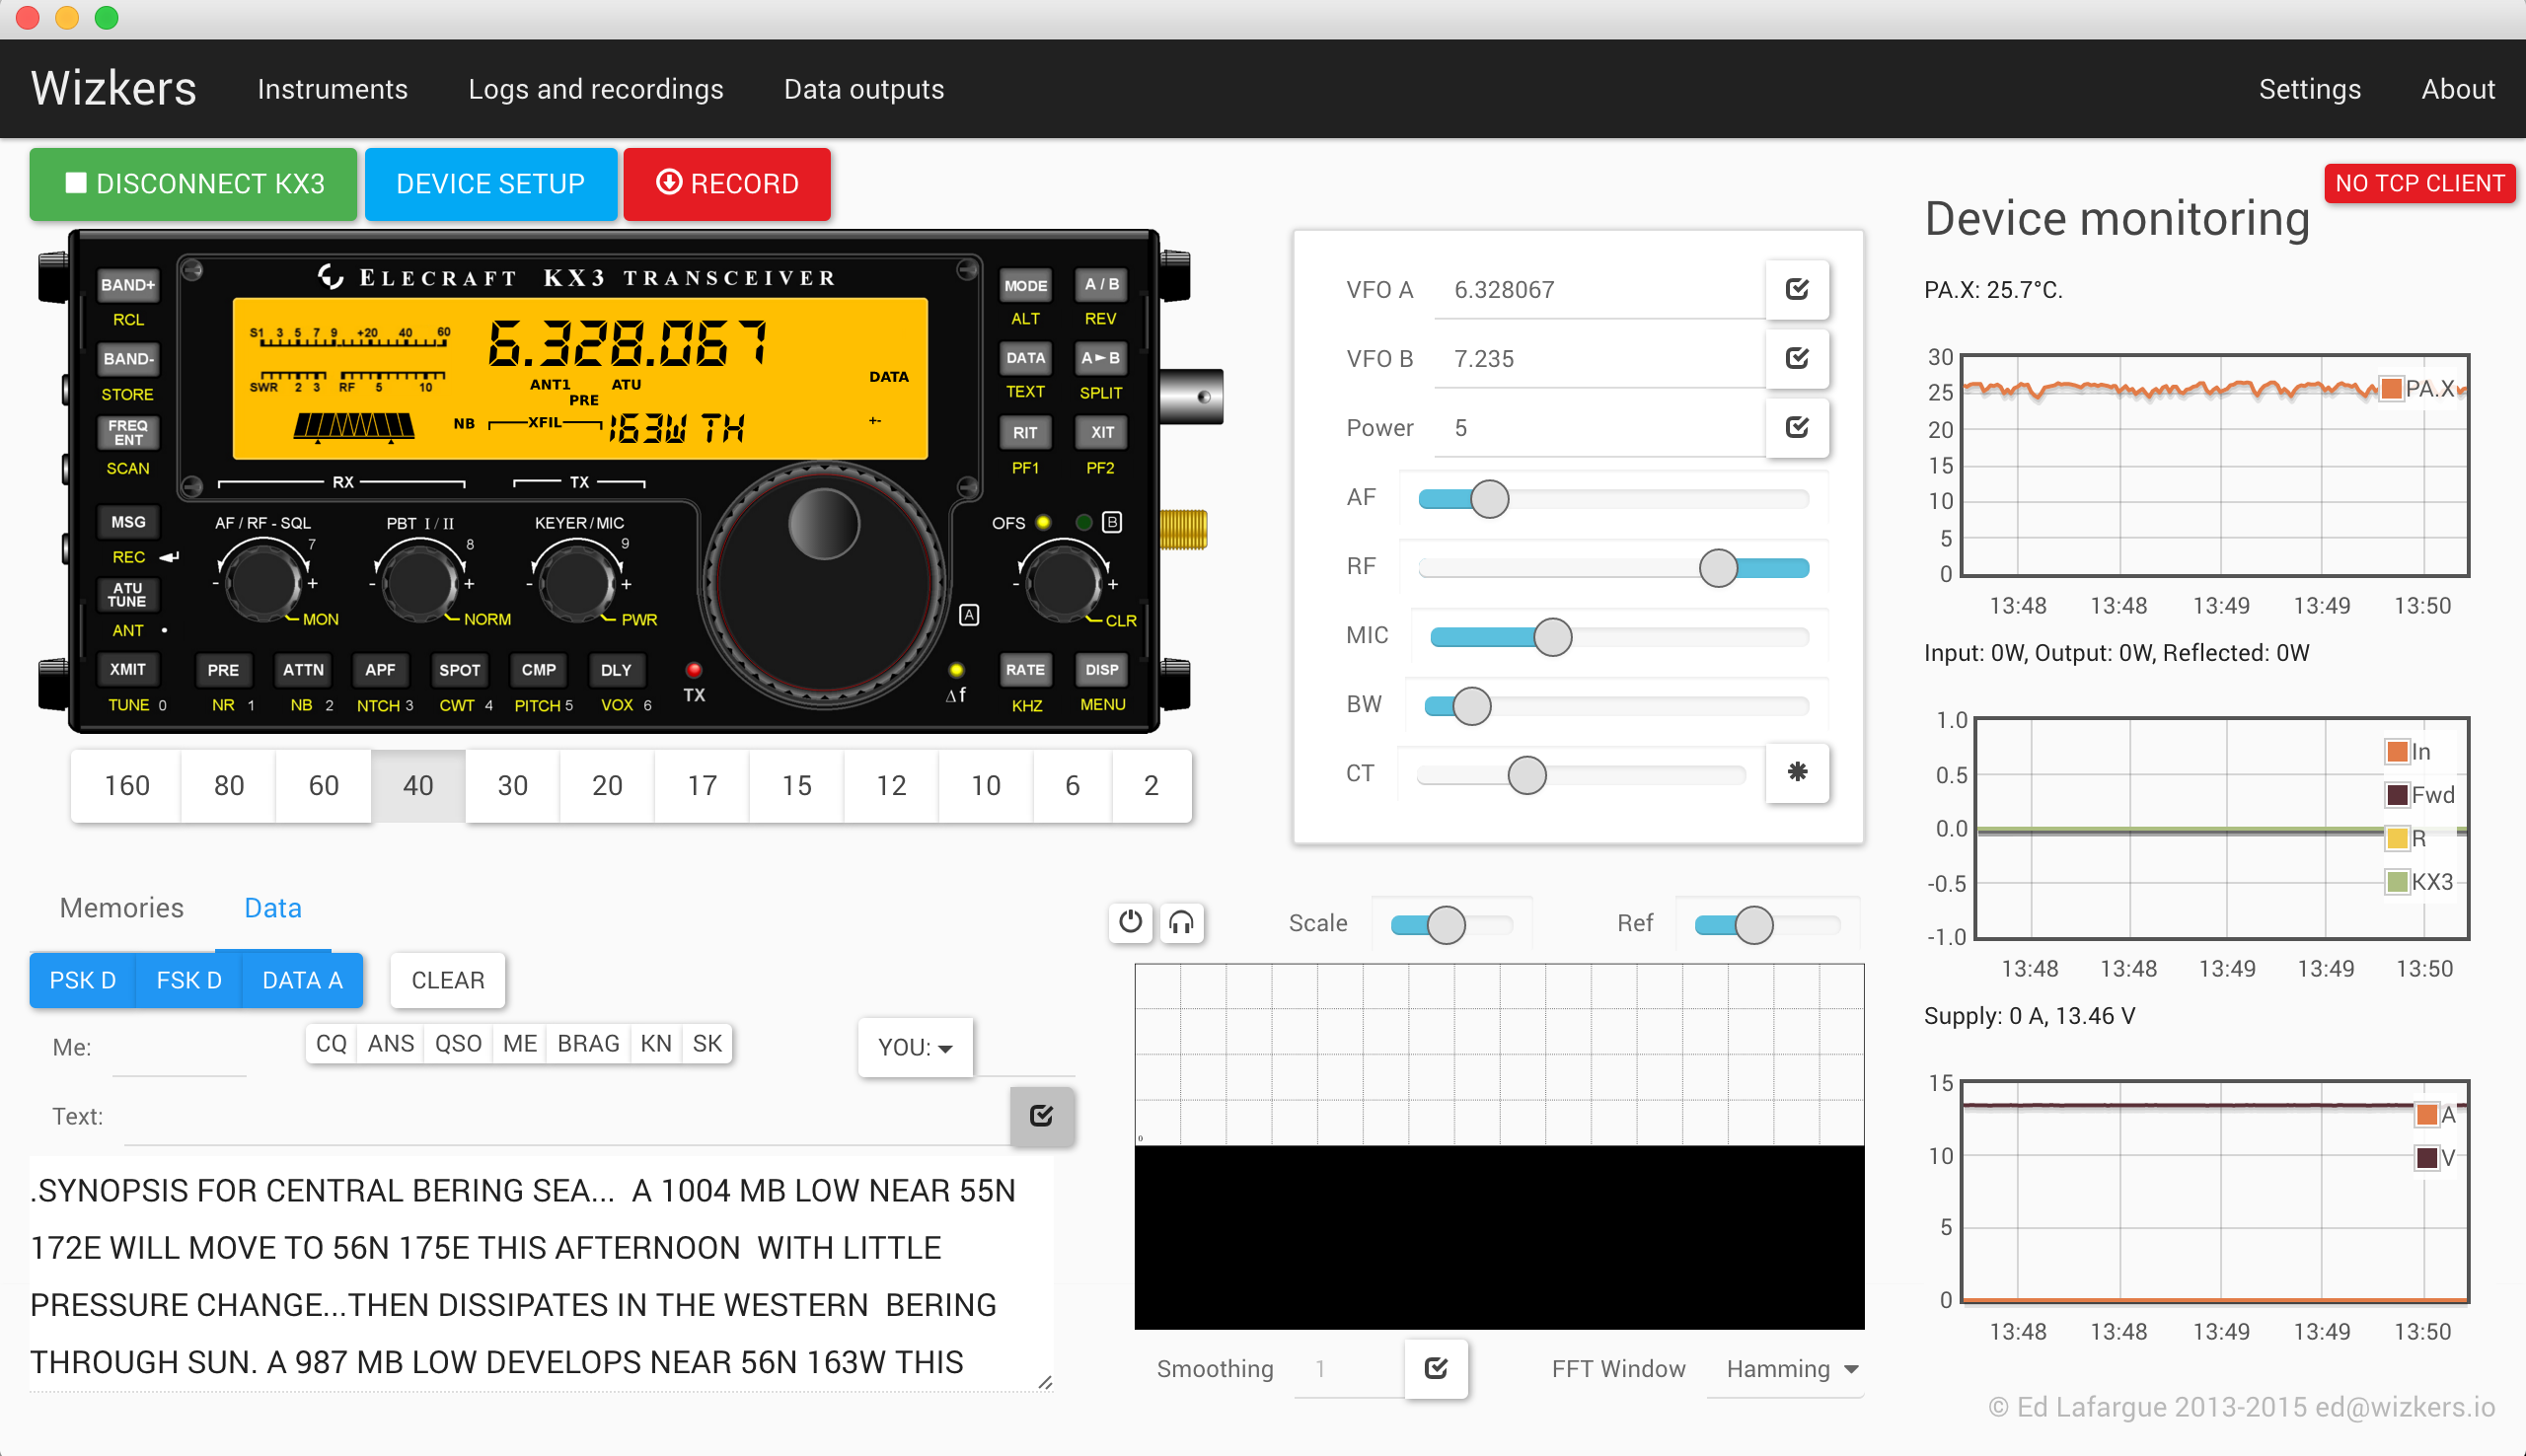
Elecraft KX3
The KX3 instrument plugin gives you pretty extensive rig controller capabilities from your computer. The first and foremost feature of this plugin is the reproduction of the KX3 faceplace – you can click on the buttons, nearly everything works. But this instrument also support advanced capabilities including complete KXPA100 monitoring and configuration, as well as PX3 support with Screenshots.
You will also get access to features that are either not directly supported or a bit involved to work with on the KX3 such as:
- Memory Management
- Monitoring of KXPA100 health
- Direct frequency access
- TX and RX equalizer setup
And when used with the "rigctld" output plugin, you can use Wizkers as the rig controller for third party software such as fldigi.
The main screen
The KX3 Faceplace
Not much to say there: most buttons work as they should – click on the text below the buttons for accessing those functions which are usually accessed by “holding” the buttons.
The display mostly works, a few elements are not kept in sync, most notably the SWR. This will be implemented in a future revision.
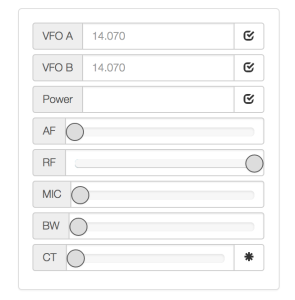
Direct input area
In this area, you can enter VFO A and VFO B frequencies, select input power, and adjust AF gain, RF attenuation, Mic gain, filter bandwidth and center frequency. Press the * button to recenter the filter.
Waterfall display
The waterfall display is the most recent feature of this plugin. It is an Audio (not IQ) display, and uses the computer’s default sound input. Press the small "power" icon on the upper left to start the waterfall. The Headphones icon sends the audio to the computer’s speakers, which is good for monitoring in digital modes, for instance.
The "Scale" and "Ref" controls let you change the rendering of the waterfall. Smoothing and FFT window are further controls to fine-tune how the waterfall looks.
Graph displays
The right side of the page shows you three graphs:
- Amplifier temperature
- Transmit power
- Power supply voltage/current
Those graphs really make most sense when a KXPA100 unit is connected to the setup. But even witout a KXPA100, you can graph the KX3 amp temperature (PA.I) or the internal oscillator temp (OSC) by enabling the display of that value on VFOB. Only one value at a time can be monitored, due to the way the KX3 is designed.
Data mode
You can access a simple data mode terminal by clicking on the "Data" tab next to the "Memories" tab:
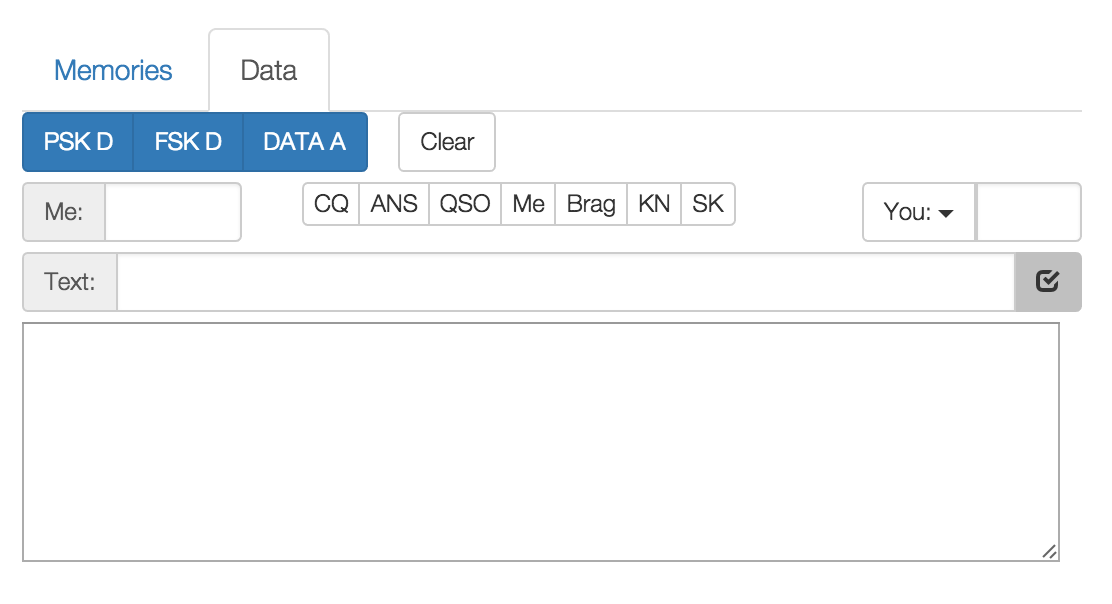
The layout should be pretty much self-explanatory. Note that Wizkers will continuously scan for call signs in the terminal window and populate the "you" dropdown menu for you.
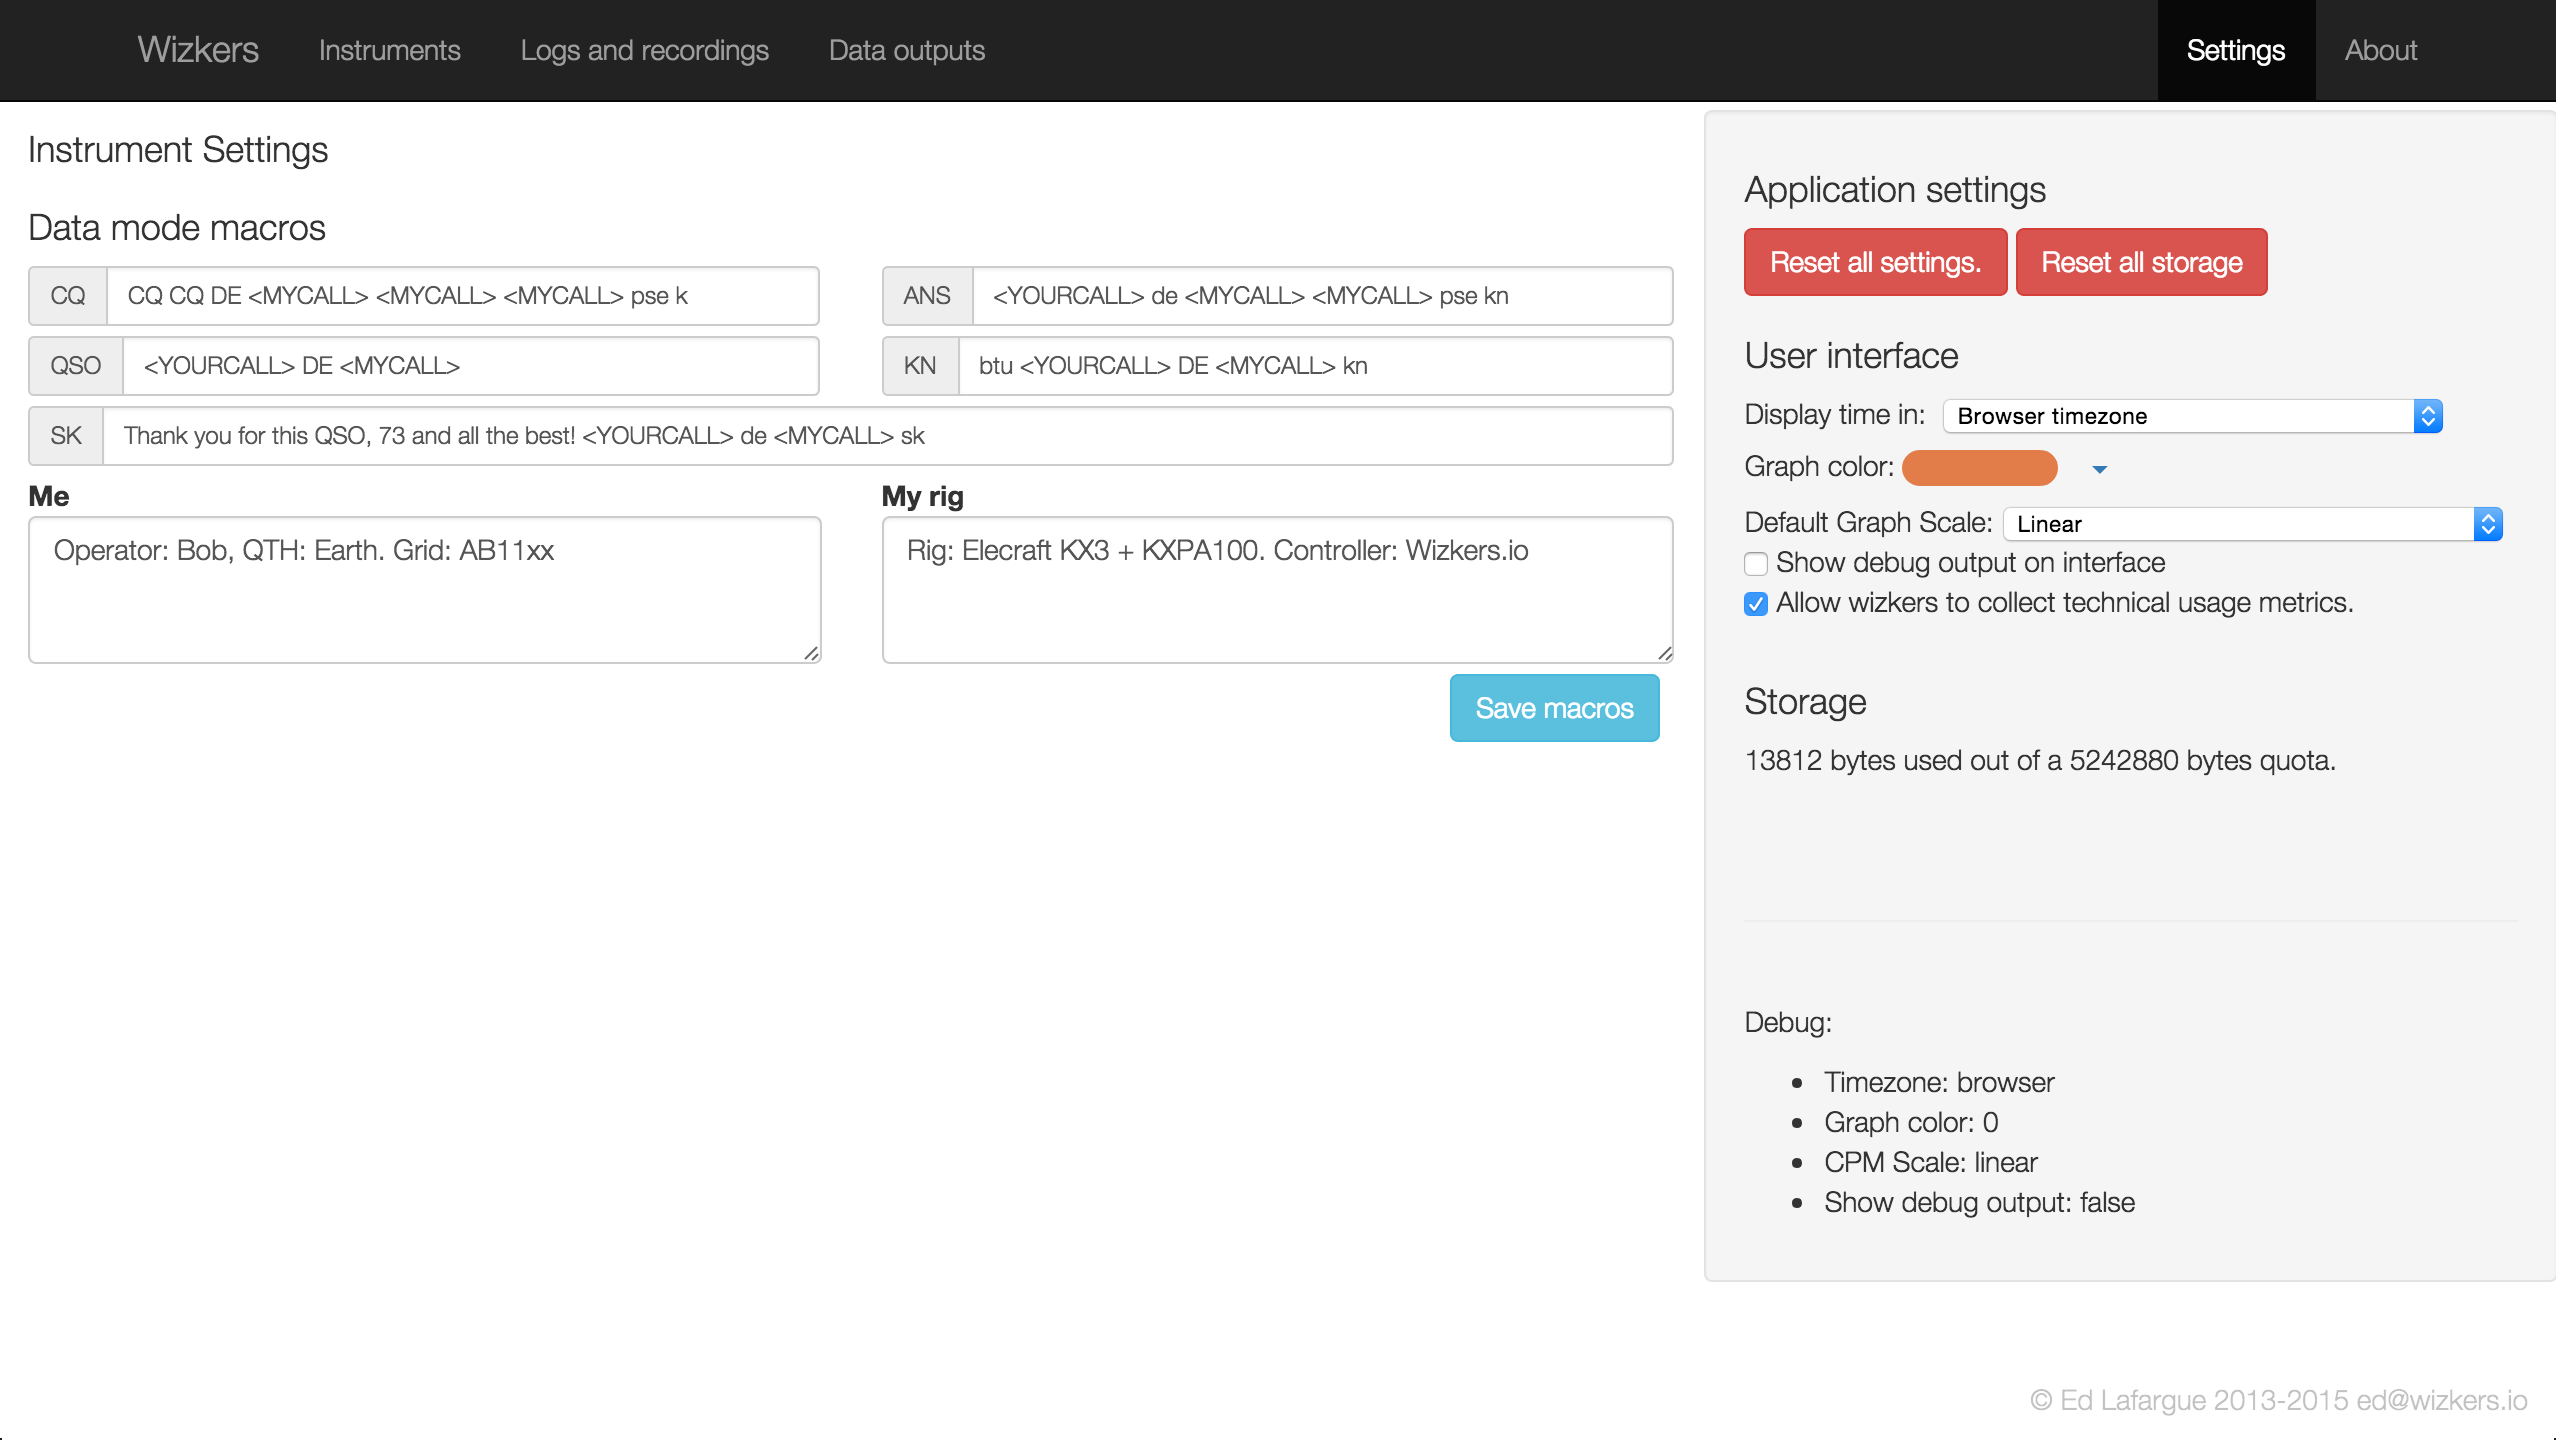
The buttons called CQ, ANS, KN, etc. are macros, which can be configured in the "Settings" screen of Wizkers, on the top black menu on the right:
KX3 Setup
The "Device Setup" screen cover the following capabilities:
- Quick diagnostics: KX3, KXPA100, PX3 versions, options installed, etc
- Configuration of the KX3 receive and transmit equalizers
- Full KXPA100 configuration and monitoring
- PX3 screenshots
KX3 diagnostics
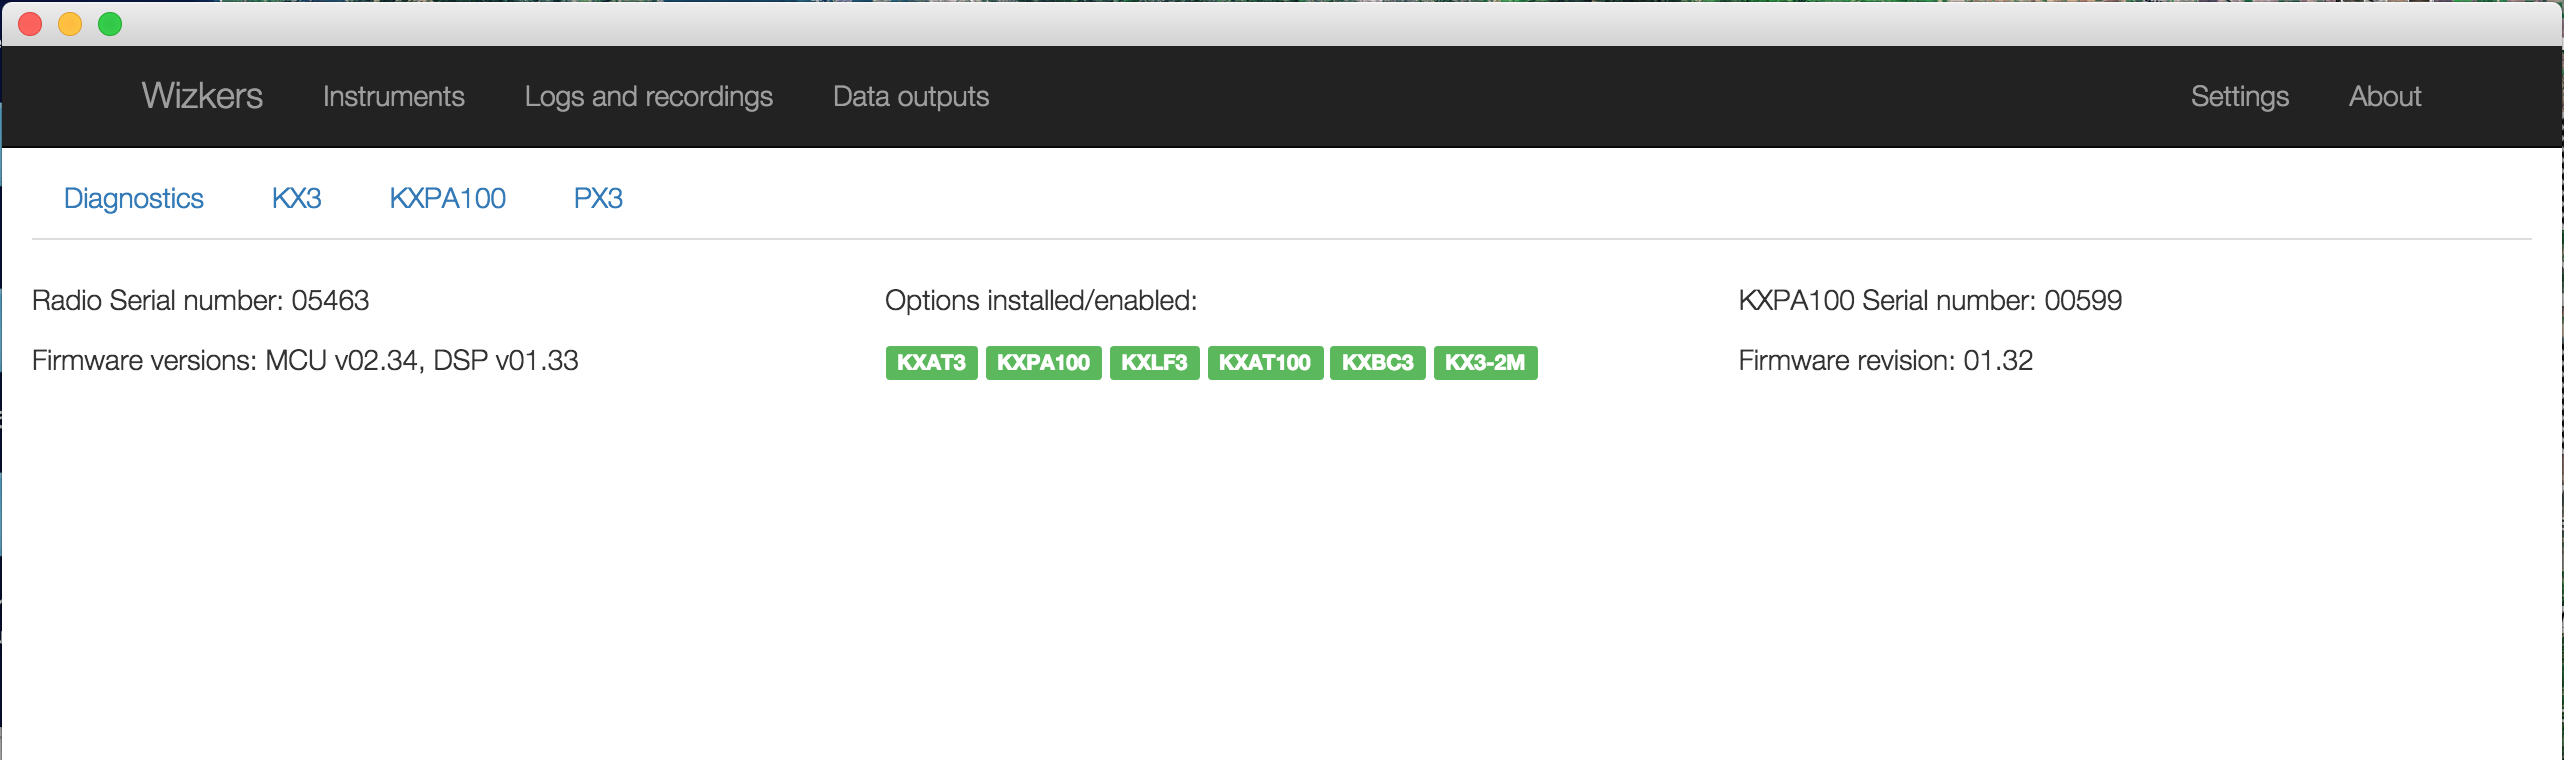
This screen is a quick summary of the current state of the KX-line setup: KX3, KXPA100 and PX3 configurations, options etc.
Audio settings
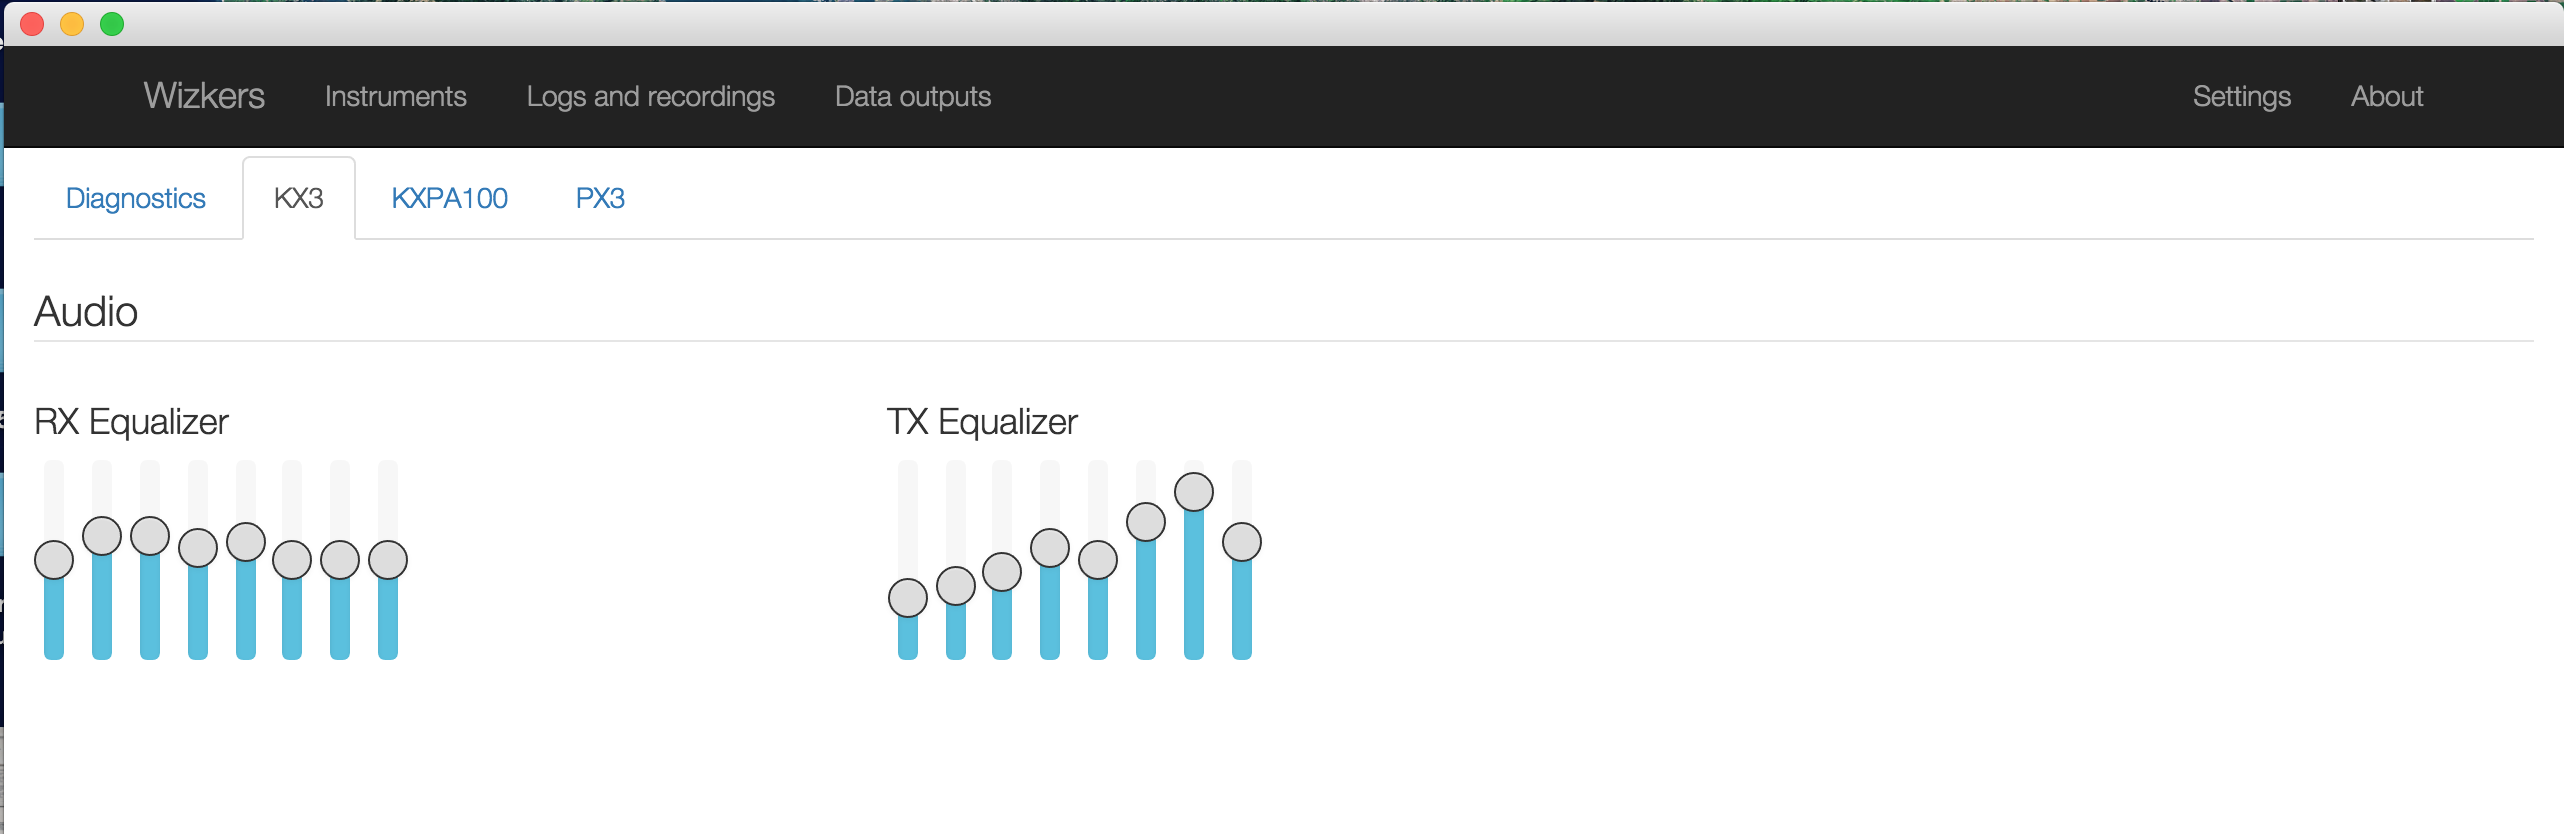
You can adjust the TX and RX equalizers there. This is a feature of the KX3 that is often underused because changing those settings on the radio is fairly cumbersome: the Wizkers UI makes it super easy.
Note: the KX3 seems to keep separate TX/RX EQ settings depending on the band. Moreover, if your KX3 is in "DATA" mode when trying to modify the settings, the UI will freeze. Put the Radio in USB mode to resume operations.
KXPA100 configuration and monitoring
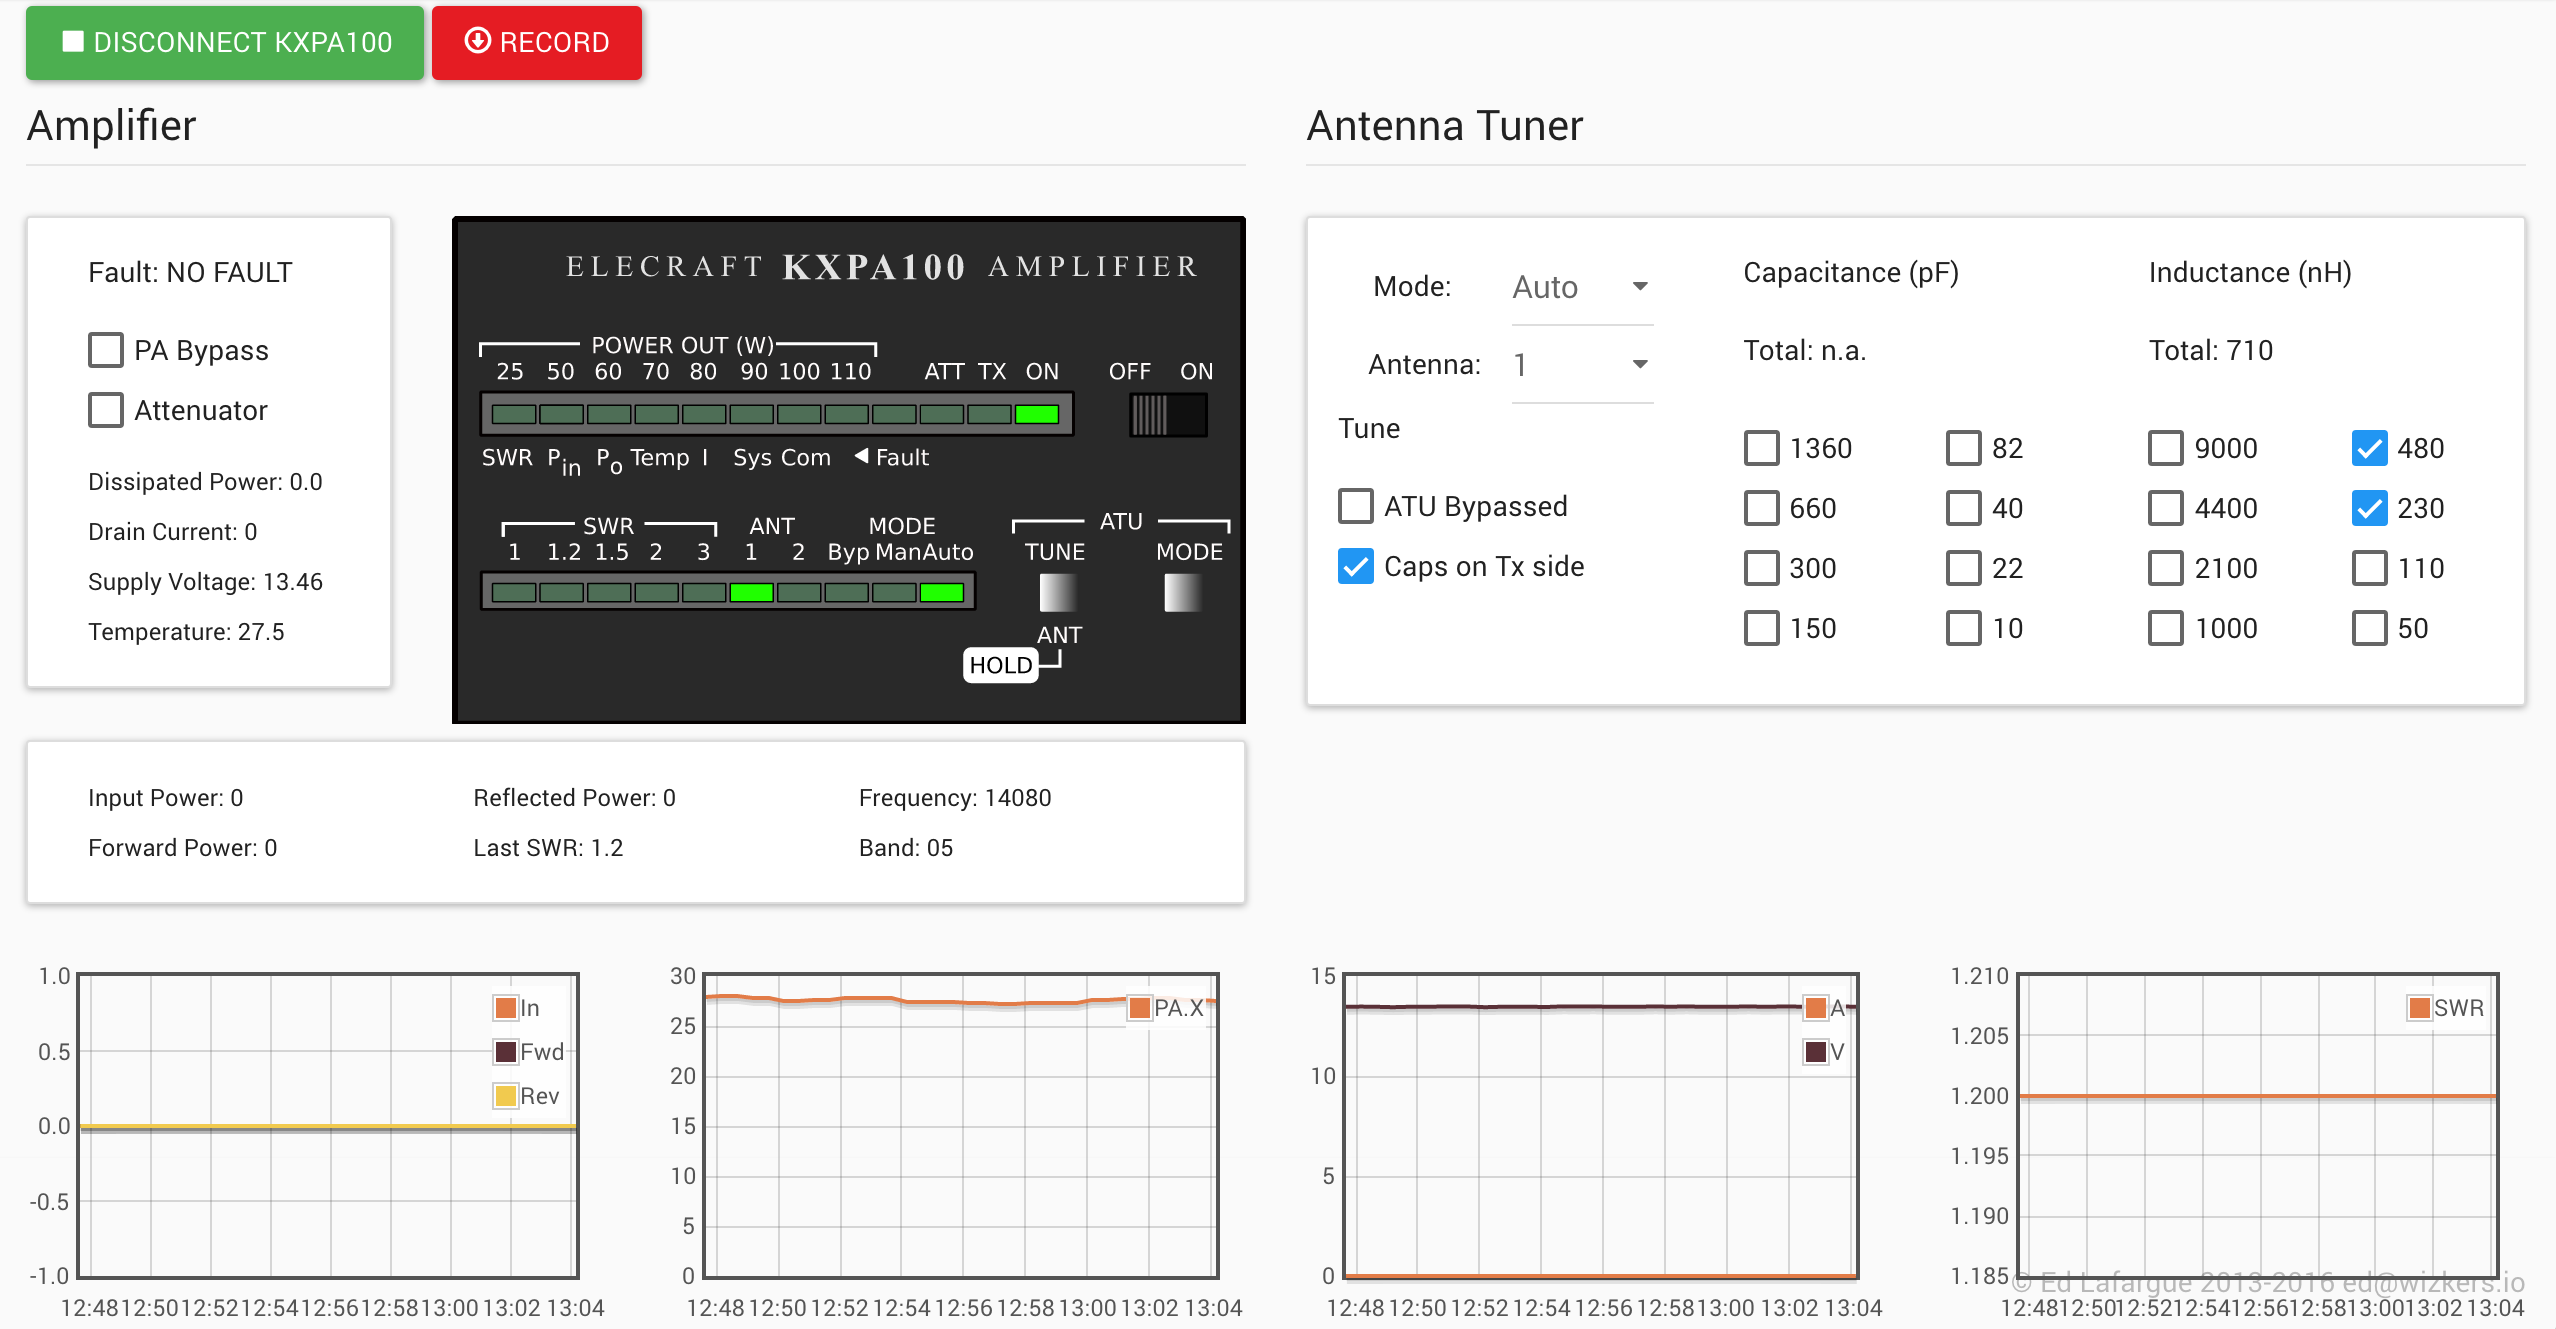
This tab reproduces nearly all the capabilities of the official Elecraft KXPA100 utility, and is also able to graph most amplifier values in real time.
You can adjust your KXPA100 settings from there and check all operating parameters. The values are refreshed twice per second.
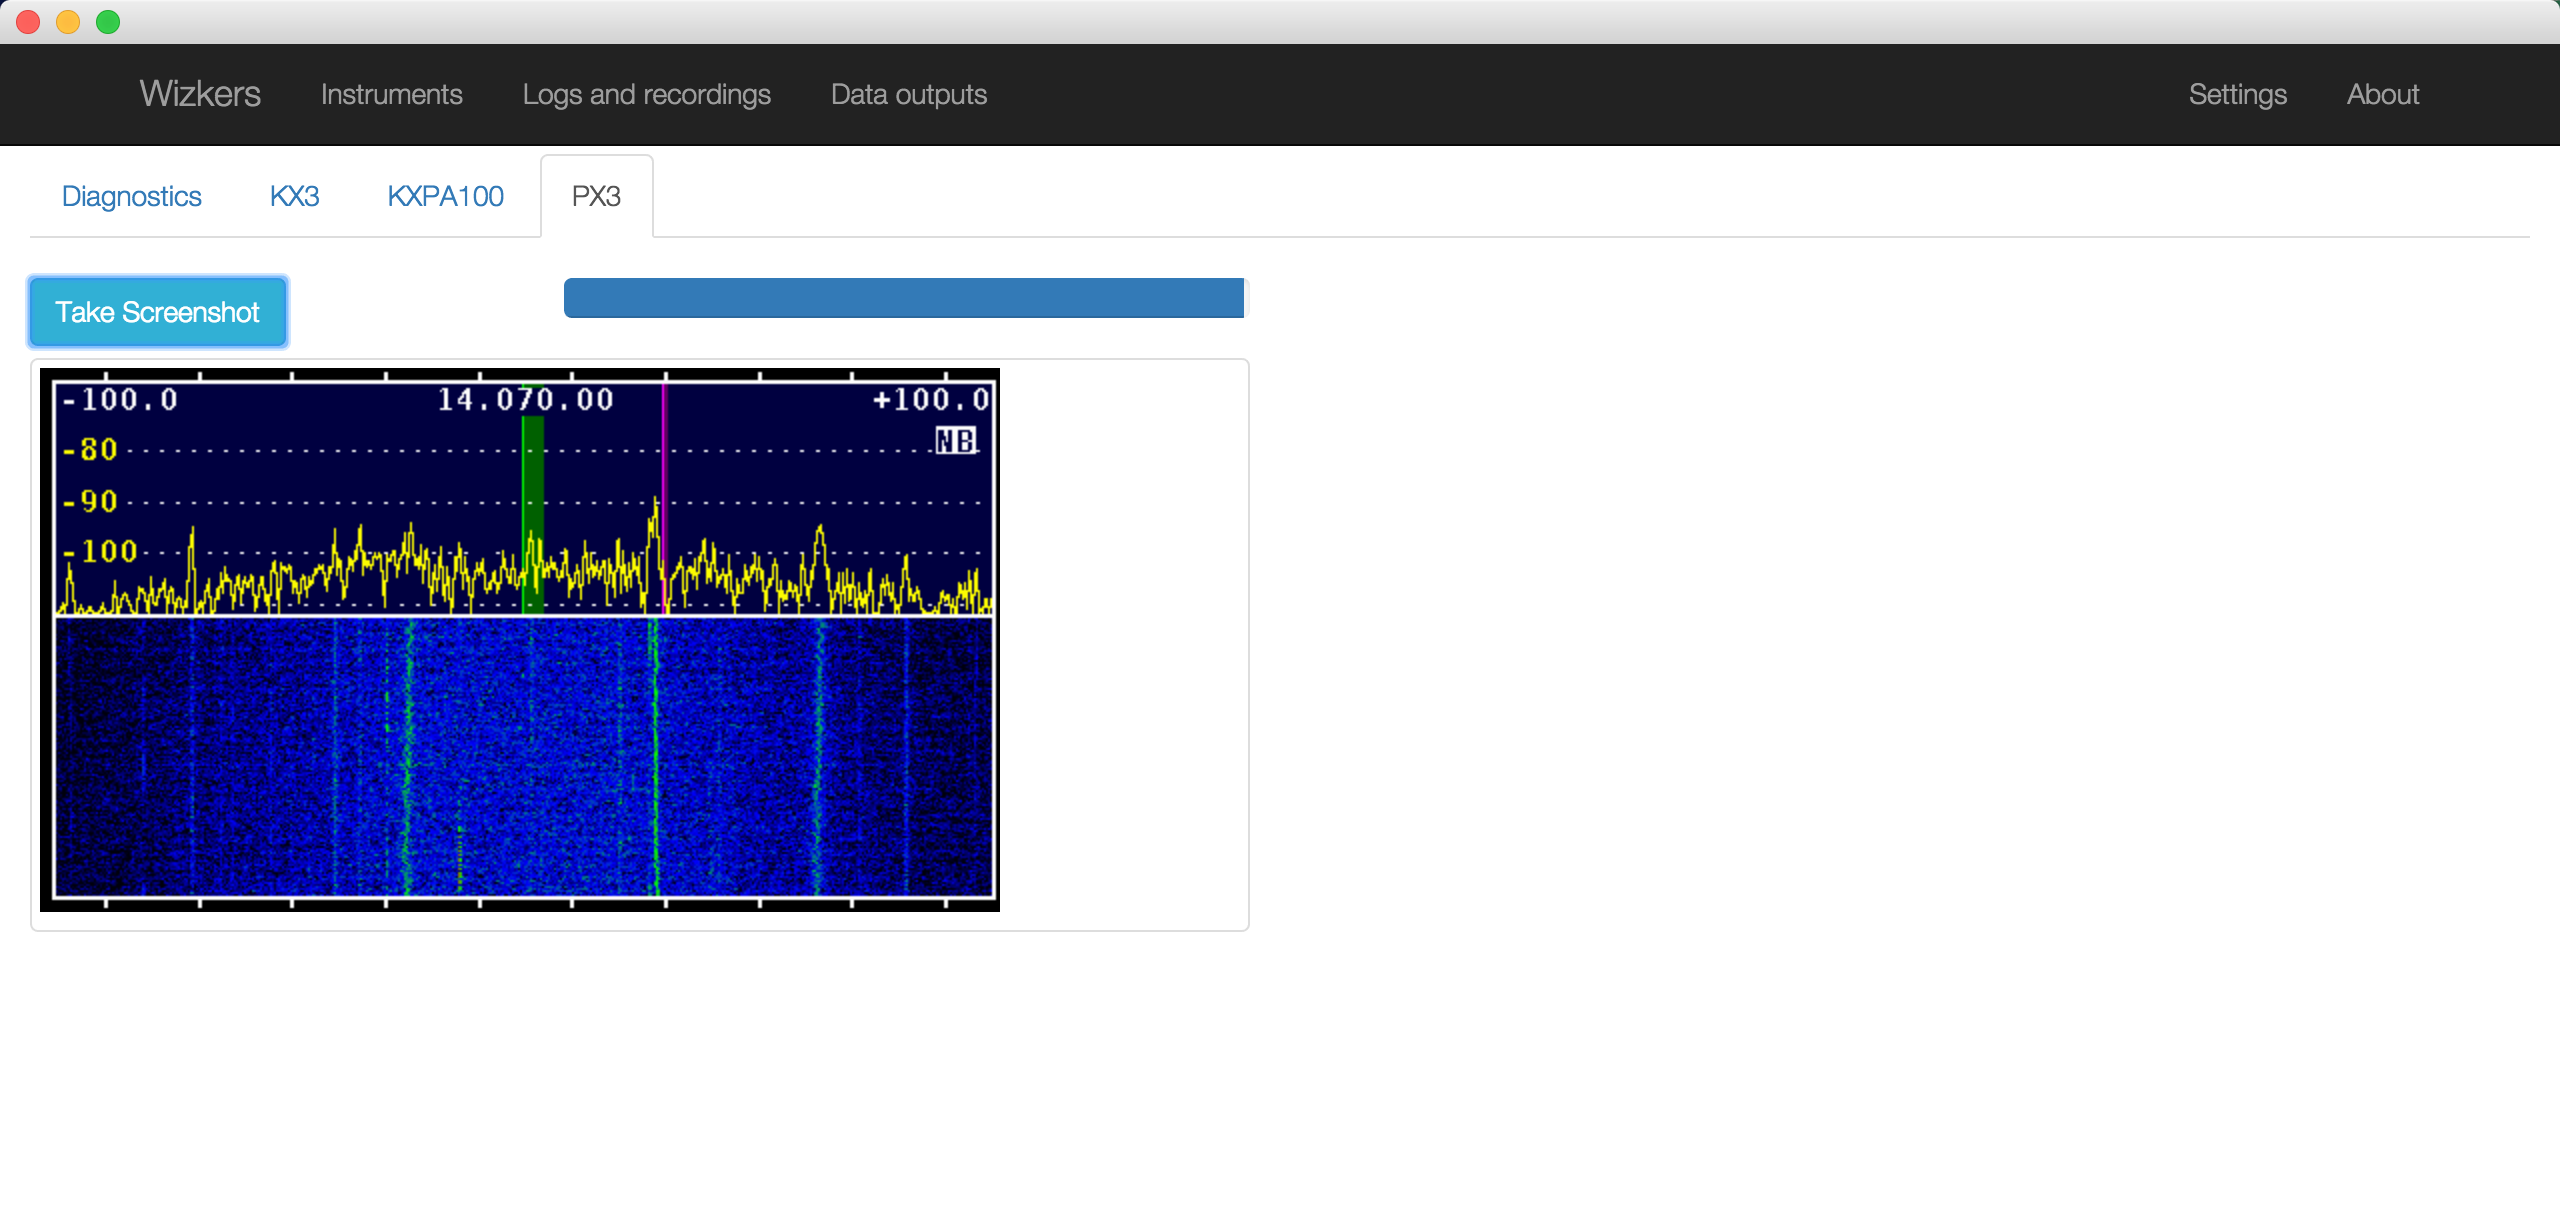
PX3 Utility
The PX3 utility lets you take screenshots of the PX3 screen, not much to say there. Click on the image to save it:
Configuring KX3 instruments on Wizkers
On the "Instruments" screen, create a new "Elecraft Radio" instrument, as shown below. Most of the fields are self-explanatory:
- Pick the correct serial port
- If you are planning to connect your radio audio to the KX3, you can also setup your sound cards here
Important note: you will need to set your KX3 baud rate to 38400 for Wizkers to talk to your KX3.
If you want to use the Pignology Piglet with this instrument, select "TCP/IP" in the serial port dropdown. You will then need to enter the Piglet's IP address and port (7373 by default). You also need to make sure the Piglet is configured for 38'400 baud.
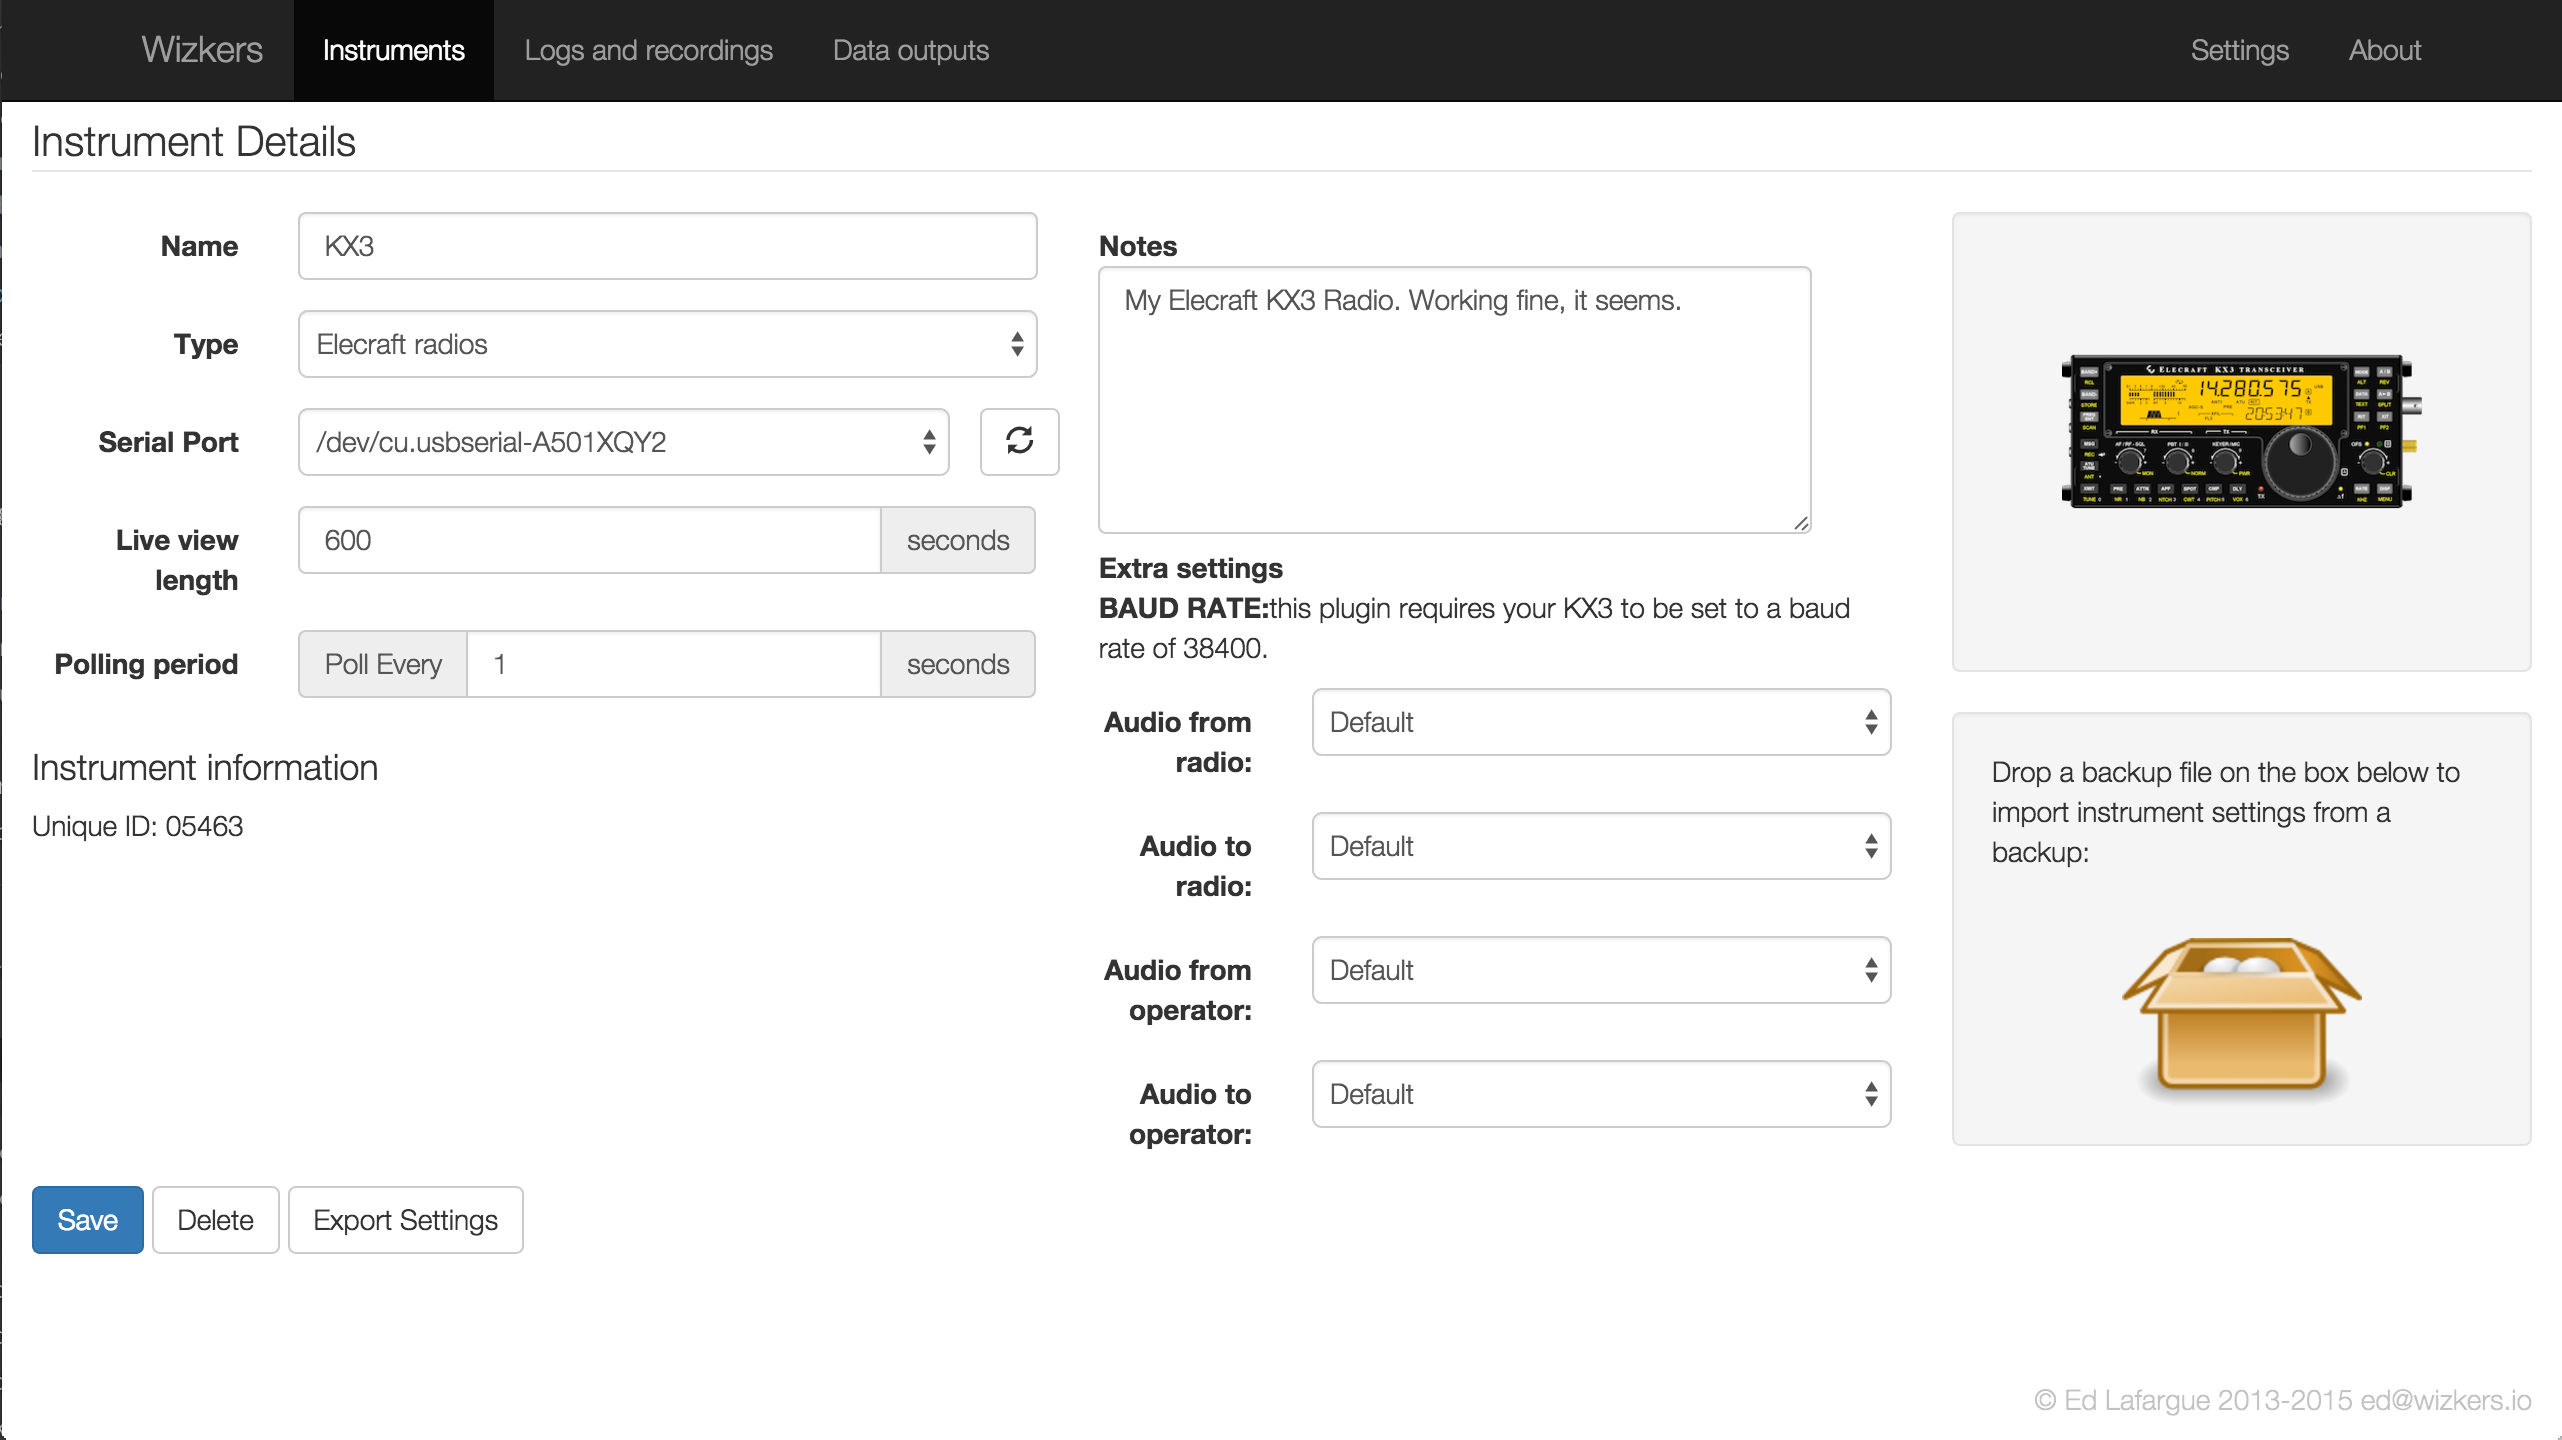
Sound card setup
The KX3 instrument gives you the ability to visualize the audio from the KX3 on a "waterfall" display, as well as monitor the audio on the computer. It can also send audio coming from your computer (a microphone for instance) to the radio. This is convenient since the radio's audio input and output are connected to your computer, to it is not possible to connect your microphone to the radio anymore.
For doing this, you will need to setup the "audio from radio" and "audio to radio" drop-downs to indicate which sound card the radio is connected to. And you can use the "audio from/to operator" dropdowns to indicate the sound card used by the operator.
Note that making full use of this setup requires two sound cards, but you can choose to simply setup the "audio from radio" and "audio to operator" dropdowns to do a simple monitoring when working on digital modes.
Why are the "Audio to..." dropdowns empty ? : You need to enable experimental support in Chrome 45.0.2441.x or later by selecting Enable experimental Web Platform features in chrome://flags or by using command line flag "--enable-blink-features=EnumerateDevices,AudioOutputDevices"